Symptom:
- The printer encounters a ‘Media Error’ when printing
- The label feeds correctly but there is no image/text when I print my label
- The label feeds correctly but the image/print fades from left to right or right to left
- The label feeds but the whole image/print is faded
- The label feeds but there are streaks or lines in the print/image
- My printer is not feeding labels or it is feeding inconsistently when I print
If you need assistance beyond the below, please reach out using our Contact Us page.
The printer encounters a ‘Media Error’ when printing
The following solutions should correct about 95% of Media Errors. Before proceeding, ensure your printer has not run out of labels and, if you are using the Thermal Transfer print mode, you have sufficient transfer ribbon. Be sure to check the labels are not peeling from the backing and that the labels and transfer ribbon are not crumpled.
- Your printer may not be calibrated for your label – if you have changed labels, you may need to recalibrate your printer. To recalibrate your printer, you can:
- RT200 and RT700 series printers – short press the ‘C’ button on the rear of the printer. See below.
- GoDEX printers without the ‘C’ button – switch your printer OFF, press and hold the ‘FEED’ button and at the same time switch your printer ON. Hold the feed button until you hear a BEEP (approximately 5 seconds). On release of the ‘FEED’ button, your printer will run a calibration and print diagnostic page.
- An incorrect print mode has been selected – you should tell the printer if you are using Thermal Transfer or Direct Thermal printing. The default, out of the box, setting is Thermal Transfer. If the printer is set to Thermal Transfer but you are printing using Direct Thermal (and therefore not using a transfer ribbon), you may get a Media Error because the printer does not detect a transfer ribbon. Below are steps on how to select the print mode in the GoLABEL software.
- An incorrect gap sensing mode has been selected – the label sensing mode tells the printer what to look for when calibrating labels and determines where the label ends. If your labels have a plain backing and there are gaps between the labels, your label/page setup should be set to ‘LABEL WITH GAPS’ and the printer setup SENSING MODE should be set to ‘AUTOMATIC’ or ‘TRANSMISSIVE’. If your labels have black marks, your label/page setup should be set to ‘LABEL WITH MARKS’ and the printer setup sending mode should be set to ‘AUTOMATIC’ or ‘REFLECTIVE’.
- The gap sensor may be in the incorrect position – the gap sensor is found in the label shoot near the label guides. This can slide from side to side and, if you are using labels with gaps between them, should be positioned in the centre of the label. If your labels have black marks on the liner that indicates where labels end, the sensor should be shifted to the side that the black mark is on. The black mark MUST pass over the sensor.
‘C’ Button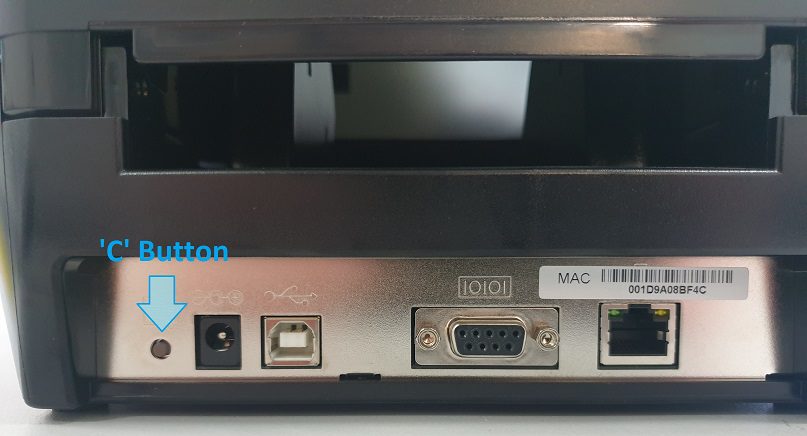 Click to enlarge | GoLabel Print Mode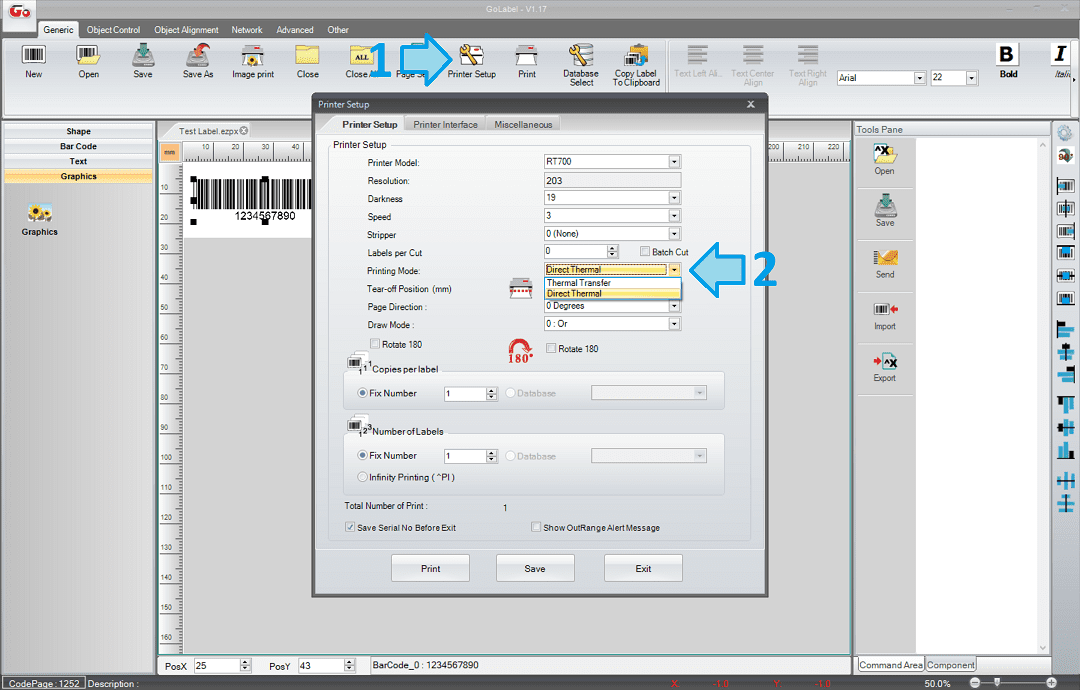 Click to enlarge | GoLabel Gap Sensing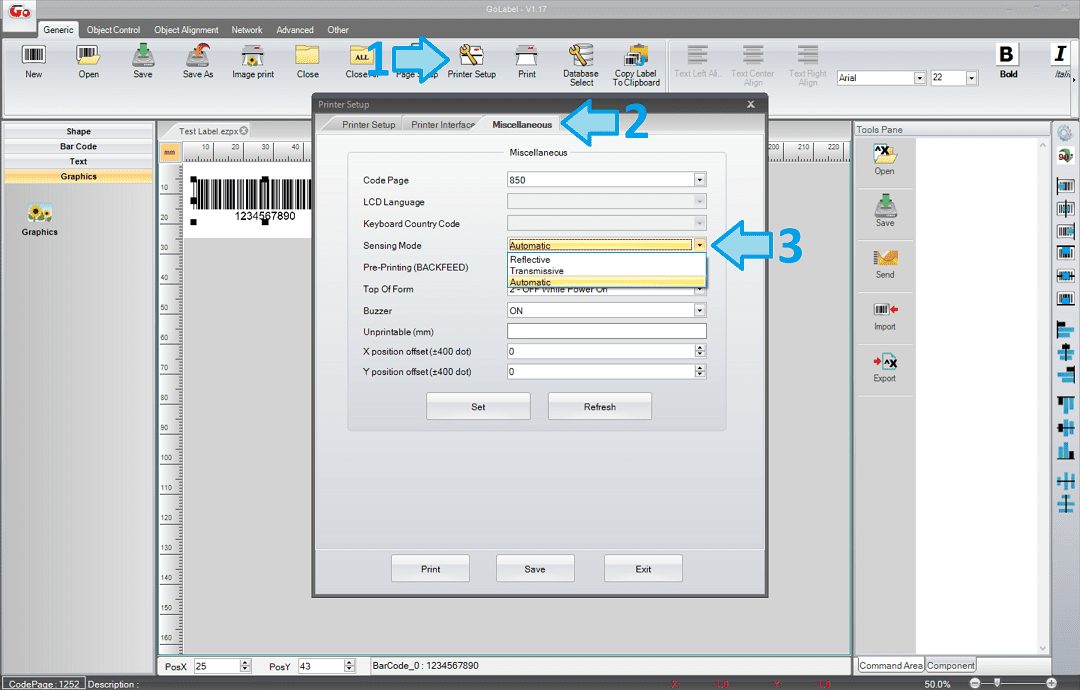 Click to enlarge | Gap Sensor Click to enlarge |
The label feeds correctly but there is no image/text when I print my label
The first thing to check is your labels. Be sure you are using the correct labels to for your print mode:
- If you are using Direct Thermal labels, you do NOT need a thermal transfer ribbon
- If you are using Thermal Transfer labels, you will NEED a transfer ribbon
You can test the type of label you have by placing the label on a table (label side up) and running your fingernail or the back of a pen firmly and quickly over the label. If you are left with a black line, you have Direct Thermal labels.
Next check that your labels are seated correctly and that they are facing UP. When checking that your labels are seated correctly, ensure your labels are under the label guides and that the guides are snug against the label liner (the backing) but not clamping it. There should be minimal side-to-side movement but no drag.
Finally, ensure the cover latches are intact. These can break if the printer is mistreated. If they are broken, they will not hold the lid down firmly enough and the print head will not make contact with your labels. The images below show cover latches that are in tact.
Label Guides Click to enlarge | Right Cover Latch Click to enlarge | Left Cover Latch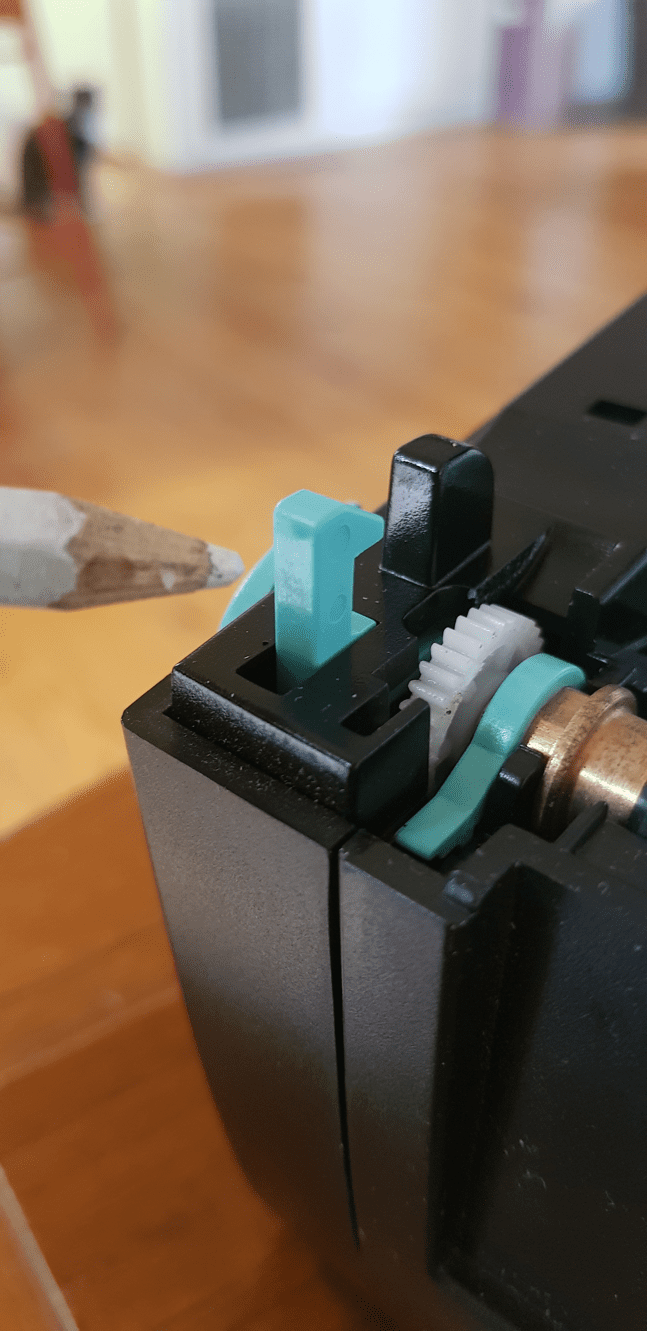 Click to enlarge |
The label feeds correctly but the image/print fades from left to right or right to left
The most common cause for this issue is that the cover has not been pressed down firmly enough or that the cover latches have broken. These can break if the printer is mistreated. We do NOT advise allowing the top cover to free fall from an open position to the closed position.
First, ensure the cover is correctly closed by firmly pressing down on BOTH the left and right side of the top cover at the same time.
If, after attempting to print again, you are still experiencing this issue, check that the cover latches are intact. If they are broken, they will not hold the cover down firmly enough and the print head will not make contact with your labels. The pictures below show intact cover latches.
How can I tell if my latches are broken? 1) visually inspect them; or 2) inspect the gap where labels feed from – if you have firmly closed the lid and one side appears higher than the other, you may have damaged cover latches.
Press Firmly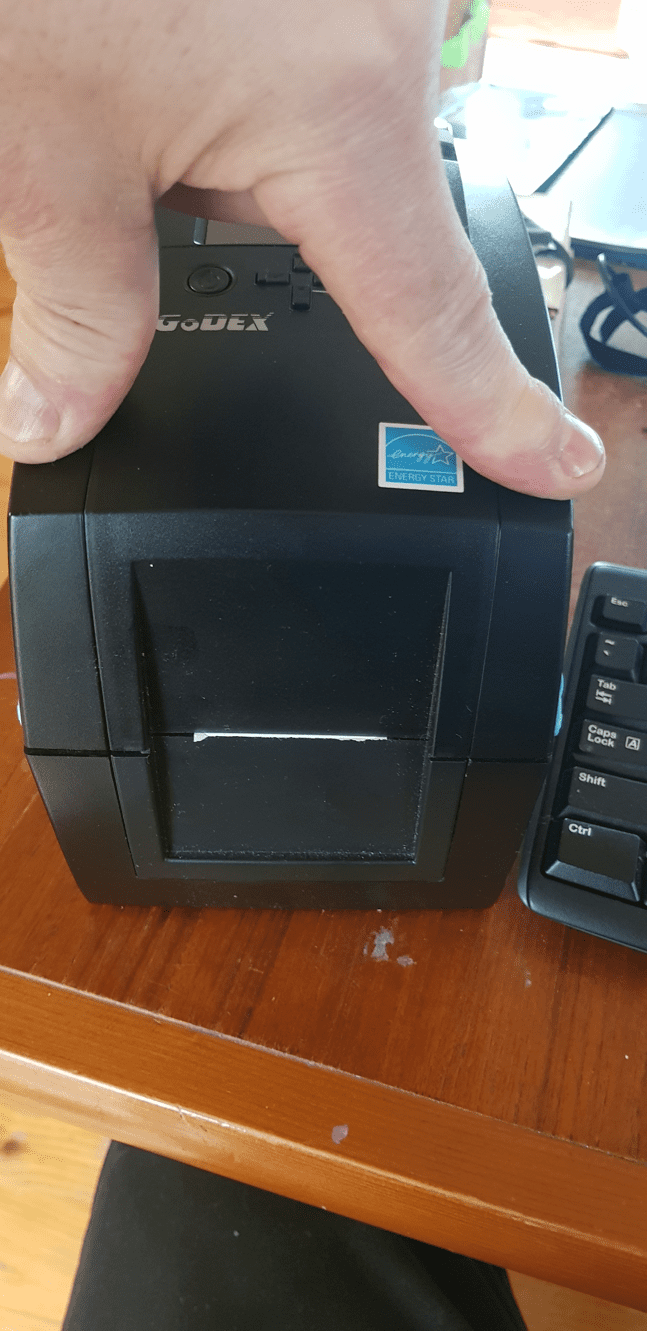 Click to enlarge | Right Cover Latch Click to enlarge | Left Cover Latch Click to enlarge | Label Feed Gap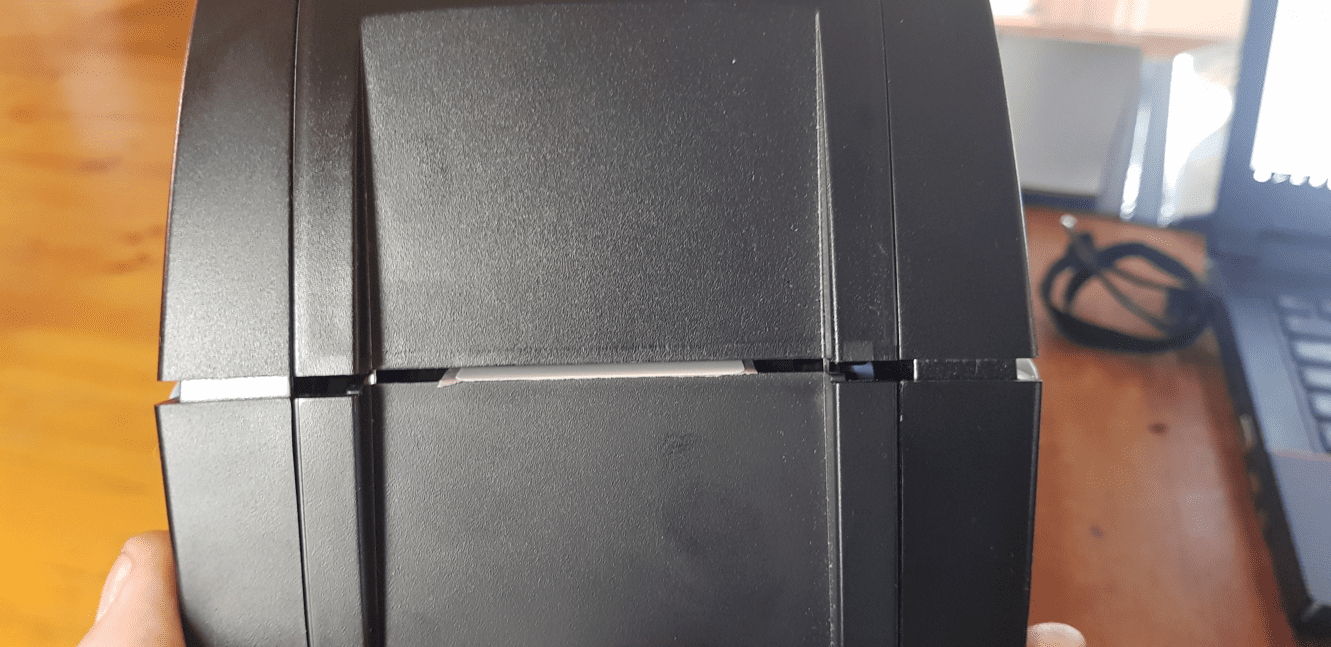 Click to enlarge |
The label feeds correctly but the whole image/print is faded
This issue could be caused by either damage to the hardware, incorrect hardware maintenance or incorrect software setting.
- Hardware damage.
Damaged cover latches may result in the print head not making firm enough contact with the label. You can find guides to check your cover latches above. - Incorrect hardware maintenance
Thermal printers do require maintenance on occasion. This might consist of general clearing of debris from the label well, ensuring no labels are stick to the platen roller or cleaning of the print head. Cleaning the print head may resolve the issue of faded printing. To clean the print head, we recommend using a cotton bud and Isopropyl Alcohol or lens cleaner. The print head is located on the underside of the top cover closest to the label feed slot, as shown in the images below. - Incorrect software setting
Check your print settings, printing too fast and/or having a low darkness setting may cause this issue. Slowing the print and increasing the darkness may correct this issue.
We do not recommend keeping the darkness setting on the highest option. This will reduce the life of the print head and you will need to replace it more frequently. Experiment with the speed and darkness to find the optimal setting for your application.
Platen Roller Click to enlarge | Thermal Print Head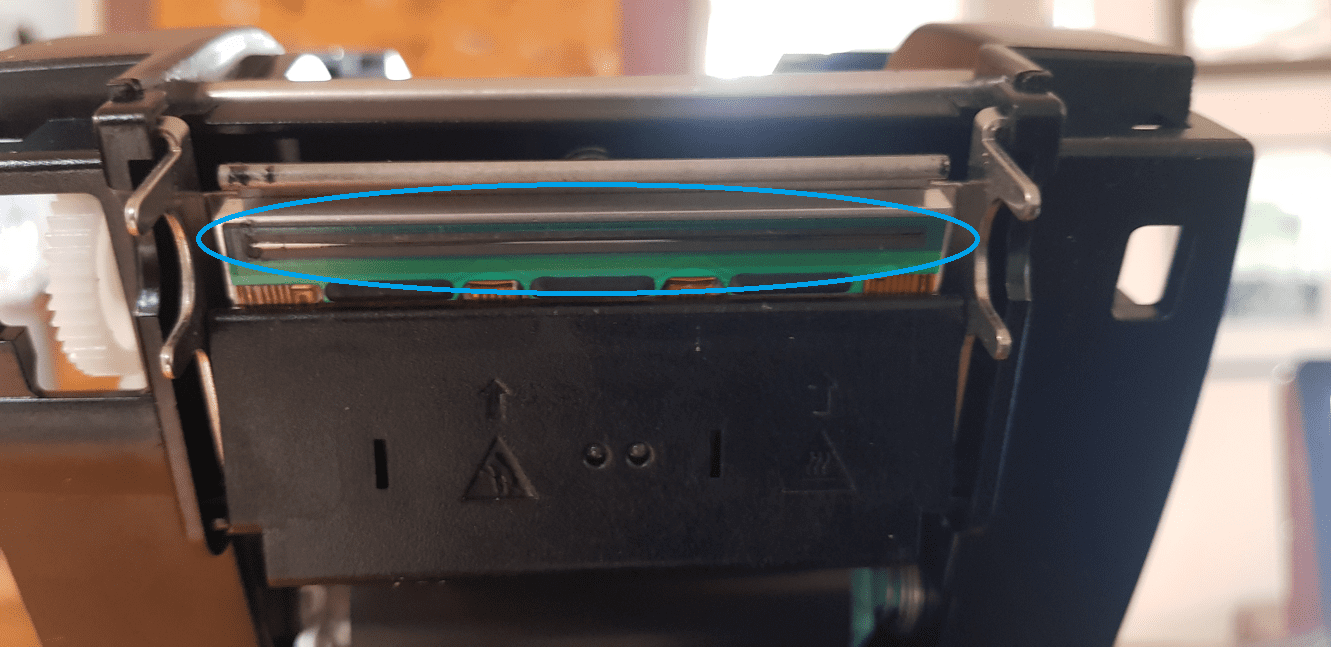 Click to enlarge | Thermal Print Head Cleaning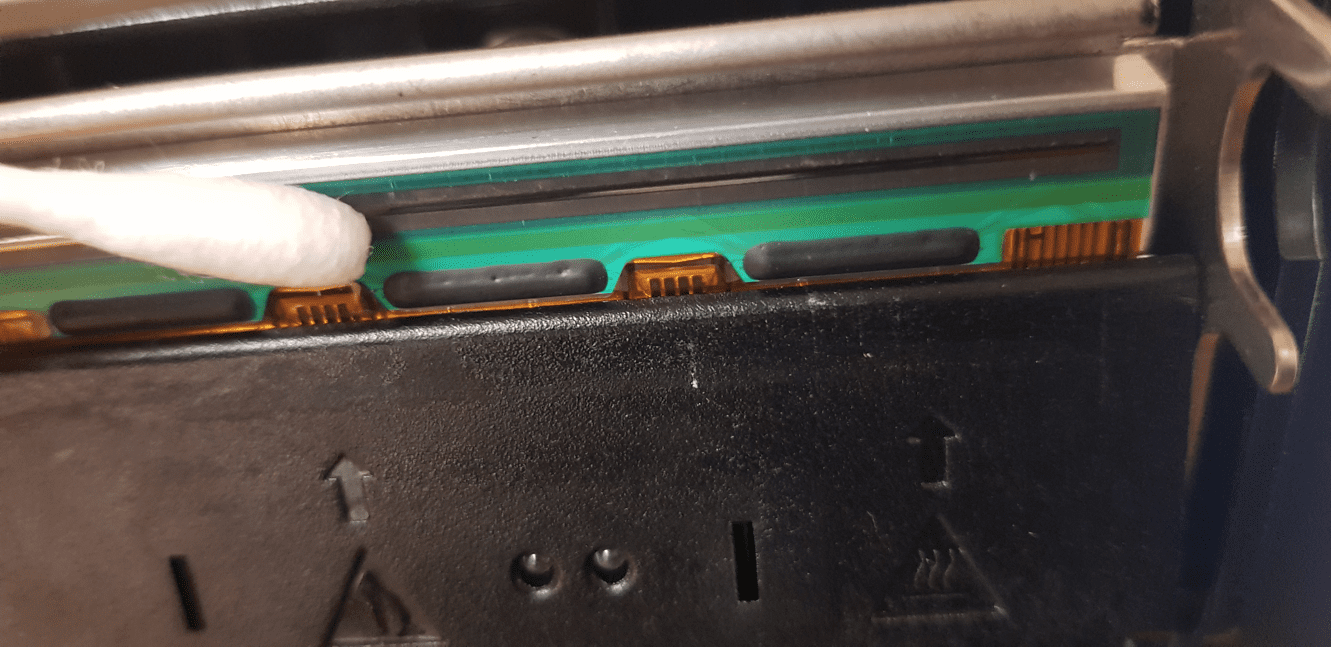 Click to enlarge | Removed Dirt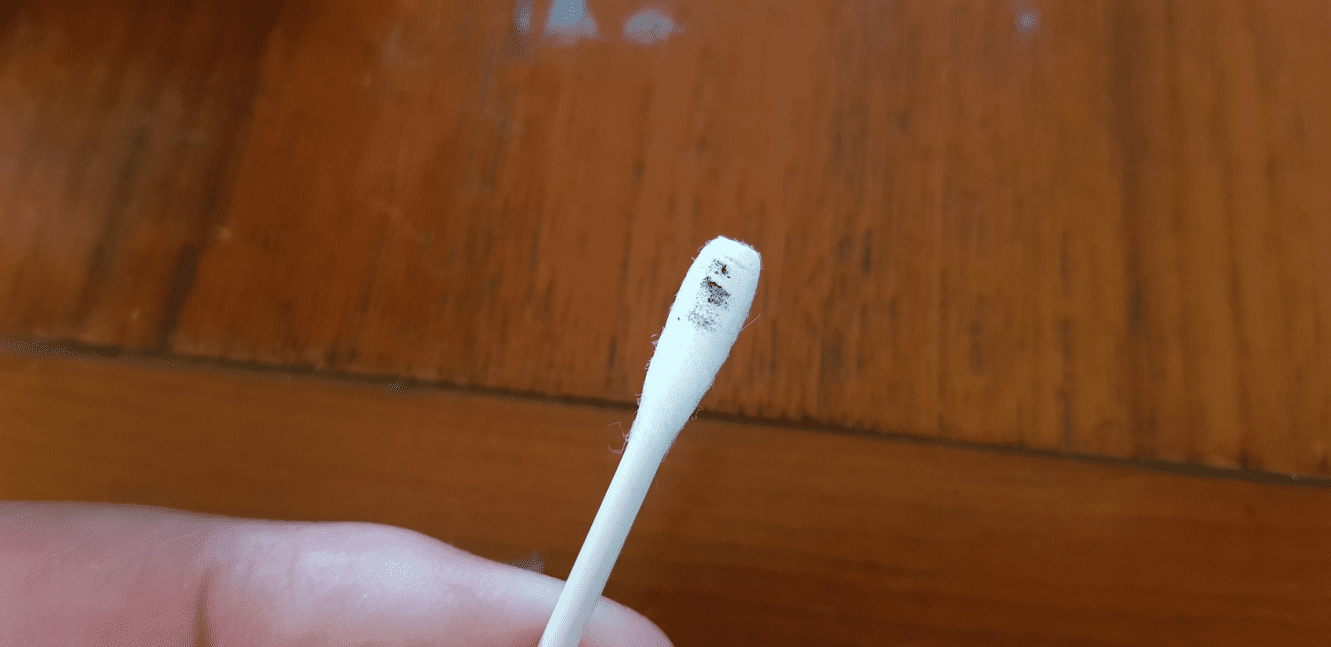 Click to enlarge |
The label feeds but there are streaks or lines in the print/image
Streaks or lines on your print/image may be caused by debris/label residue on your print head or that the print head is damaged/worn out.
Thermal printers do require maintenance on occasion. This might consist of general clearing of debris from the label well, ensuring no labels are stick to the platen roller or cleaning of the print head. Cleaning the print head may resolve the issue of streaks or lines in your print. To clean the print head, we recommend using a cotton bud and Isopropyl Alcohol or lens cleaner. The print head is located on the underside of the top cover closest to the label feed slot.
If after cleaning the print head you are still experiencing vertical lines (when looking directly at the printer), you may have a damaged/worn out print head. If you are printing barcodes, this may impact the readability of your barcode. Print heads can be relatively easily replaced. Please contact us for print head pricing and availability. A short term fix could be to redesign your label to avoid the damaged/worn out print pixel(s).
| Thermal Print Head Click to enlarge | Thermal Print Head Cleaning Click to enlarge | Removed Dirt Click to enlarge |
My printer is not feeding labels or it is feeding inconsistently when I print
If you are encountering this issue, the first thing to check is if the printer is responding to the print command. To do this, ensure your printer is in a ‘READY’ state, as indicated by a SOLID GREEN indicator light. If the indicator light is flashing red or orange, press the FEED button once to return the printer to a ‘READY’ state. If this does not correct the issue, ensure you have sufficient labels and thermal transfer ribbon in your printer.
Now that you are in a ‘READY’ state, press and hold the FEED button for 3 seconds. Does your printer:
- feed labels correctly? If YES, attempt to print using your input device. If you cannot print using your input device you may have a communication error.
- sound like it is printing but no labels are coming out? If YES, you may need to check the following:
- Check that your labels are installed correctly. Ensure they are sitting on the spool correctly and not resting on the base of the label well. Ensure they are not being clamped by the label guides. If you have just installed the labels, ensure they are protruding from the label shoot slightly on the first run to ensure your printer can find the first label gap/black mark.
- Check that there is no debris on the platen roller. The platen roller is what drives the labels out of the printer. On rare occasions, labels dislodge themselves and can stick onto the platen roller. Remove any debris from the platen roller and attempt to feed labels again.
- Check that the platen roller is not damaged. Visually inspect the roller for damage/wear and tear. Next, with the printer cover open and no labels in the printer, press and hold the feed button. You should see the platen roller rotate. If it does not rotate but you can hear a motor working, you may have a damaged platen gear which can occur through mistreatment (typically through manually ‘dragging’ labels out of the label shoot). You can purchase new platen roller and gear sets from DCS (Aust.).
- None of the above. You may have a deeper issue. We suggest contacting DCS (Aust.) for assistance.
| Correctly Installed Labels Click to enlarge | Platen Roller Click to enlarge |